Wednesday, November 2, 2011

Just when you thought it was safe...


Well hey there everyone – how have you all been?

I have to admit that right off the bat – this blog post has been sitting on my desktop for about three months. See, I’ve been waiting for a spare evening or two to put some thoughts together and try and write something meaningful to accompany these images (which incidentally I posted on our Facebook page over a month ago) but alas time has well and truly gotten away from us. 

As some of you may know, we recently ran a promotion on Scoopon.com that ended up just going crazy and I have been shooting literally every day, 7 days a week for... um, about the last four months. That, in addition to our already scheduled wedding and commercial shoots has really taken it's toll on my spare time lately. So sorry about that. But what I’ll do now is a quick sum up of the images in this blog post – for those that might be interested.


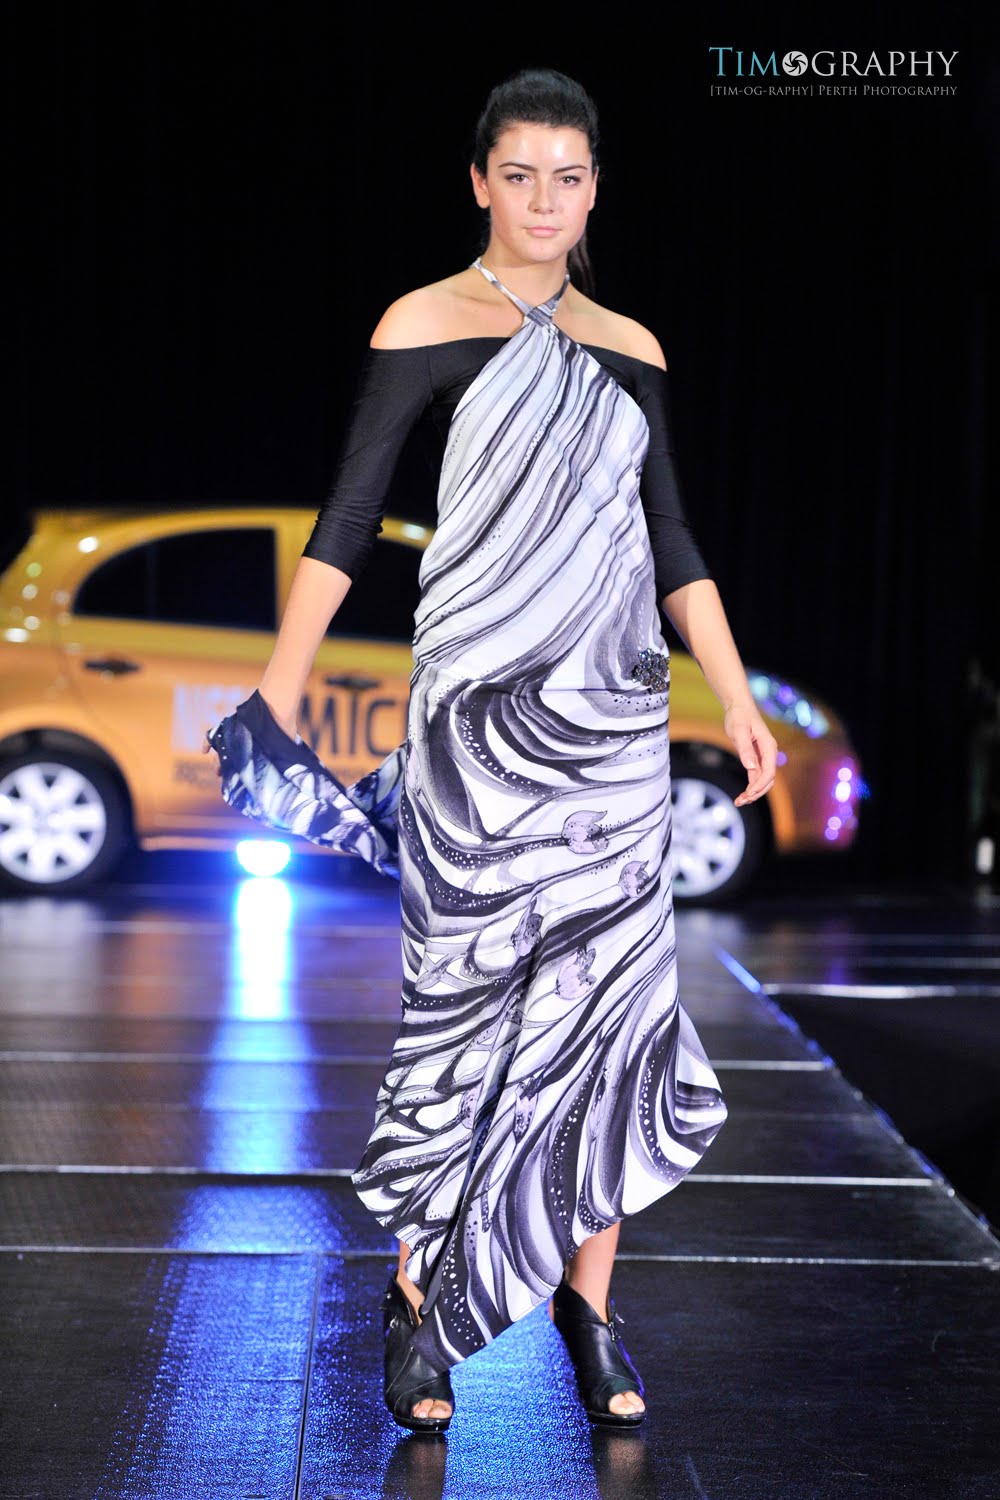
Ok, the first image. This was taken for a local fashion importer. We took a bunch of shots for their web and advertising needs but they were ultimately looking for an image to go into an upcoming edition of Australian Vogue magazine, and this was one of my favourite images from the shoot. The first half of the shoot took place in our studio, with the client having us photograph a couple of dozen outfits just against a plain grey backdrop with the model being lit with an 8ft parabolic umbrella as the key light, and a small 40cm beauty dish with a grid and sock directly above the model just to accent her facial features a little bit.

We then headed just down the road here in Kelmscott to a vacant lot adjacent to a new housing estate. The sun was getting quite low, which is just where we wanted it in order to backlight our model. Lighting for this shot was provided by a Bowens GM500 monoblock flash, which in turn was being powered by the Bowens TravelPak battery pack, and from memory it was pretty much on full power as we had to place the light a little bit from the model so it wouldn't be seen in the final image. I had placed a big 3ft x 4ft softbox on the front of the flash to make sure that we would get a nicely diffused and soft light on the model. That’s it. Taken with my Nikon D3s, 1/250th second, f/16, ISO200 with the Nikon AF-S 70-200mm f/2.8G ED VRII lens at about 190mm to compress perspective and draw the background closer in on the model.


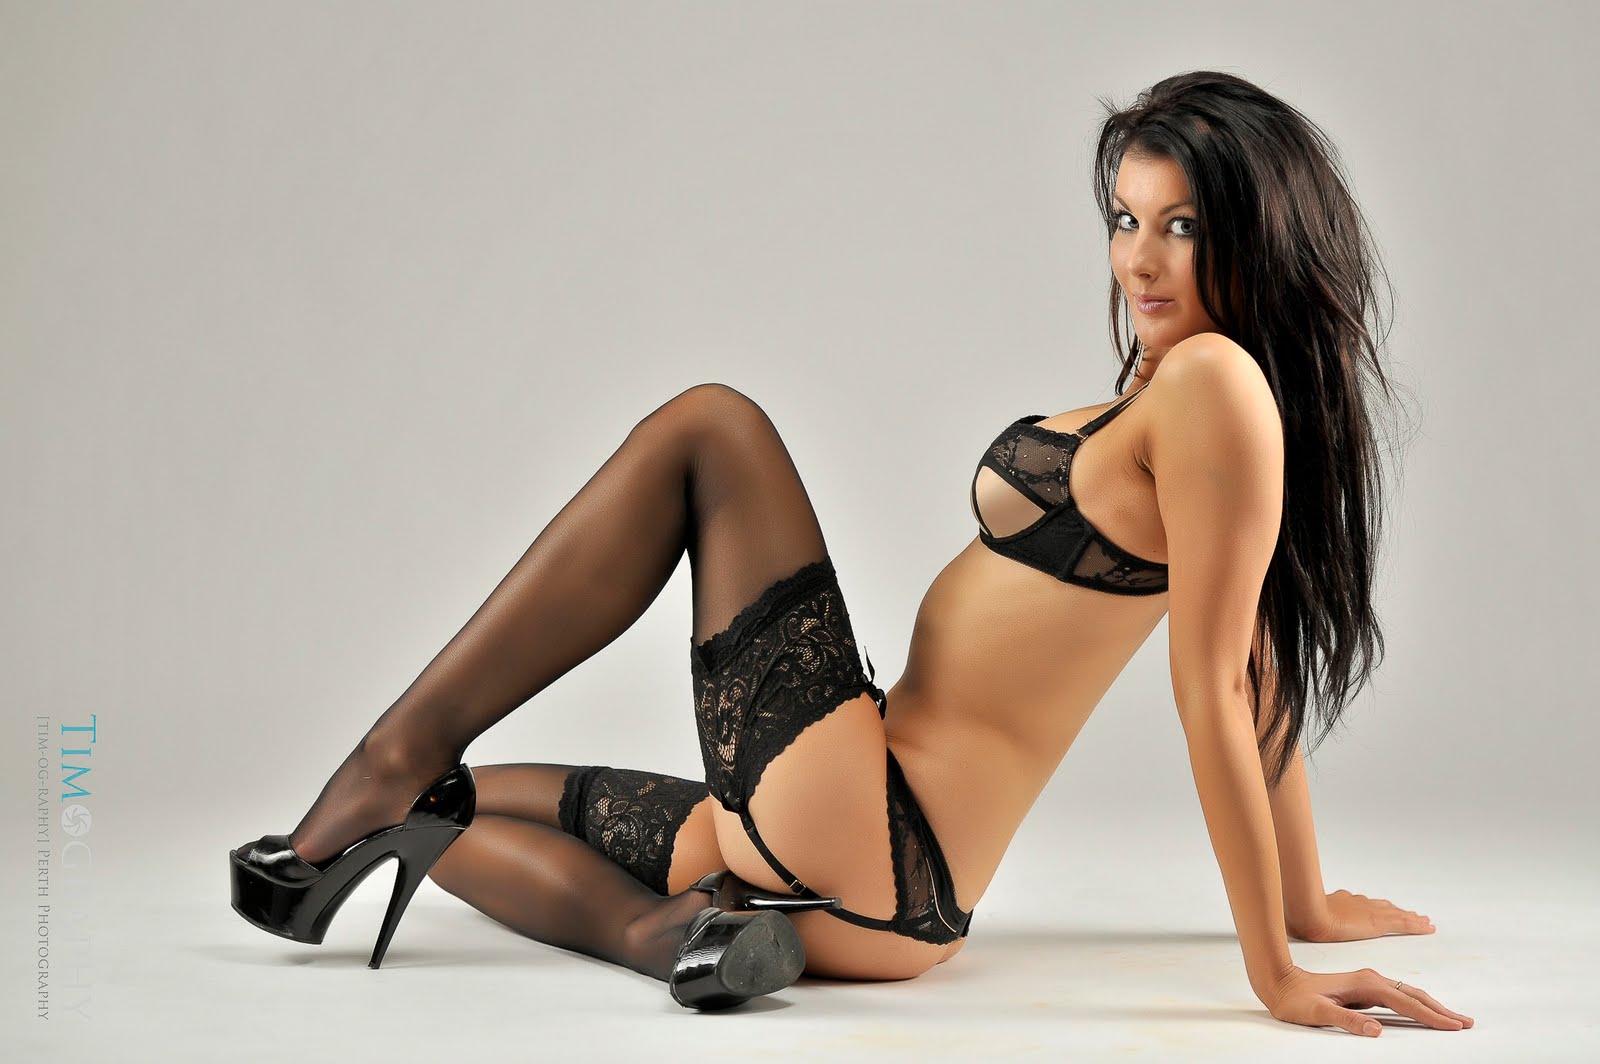
This next image is one of Serena again. This shot was taken for another fashion importer for their new upcoming website. As for the lighting – it was actually pretty simple and very similar to that described in the last image. That being; I put up the parabolic umbrella to camera left as the key light, powered by a Bowens GM200. The parabolic umbrella is so efficient that it really doesn’t require much power to produce a nice big and soft spread of light. The second and last light source for this image was my larger 70cm beauty dish, this time without a grid or a sock. But it was powered however simply by a Nikon SB-900 speedlight. The beauty dish is just above the models head and just outside of the frame in this image. Point being, it really didn’t need much power at all because it was only about 2ft from Serena’s head. I did end up putting the diffusion dome on the SB-900 however and I wanted to get a little bit more of a spread of light than I was otherwise getting without it.

The beauty dish also caused a happy little accident in this image. Let me explain! Because of where the beauty dish was placed, in combination with it being lit but the SB-900 (which sits differently within the dish than a normal monoblock flash would) and I wasn’t using a grid or a sock, the arc shaped shadow you see going across the top of the background is actually the shadow produced by the rim of the dish. After the first couple of test shots I took I pointed it out to the client and was set to put on the sock to get rid of the shadow, but the client liked the look of the shadow so we left it right where it was. Taken with a Nikon D3x, 1/160th second, f/9, ISO100 with my Nikon AF-S 70-200mm f/2.8G ED VRII lens at about 70mm.


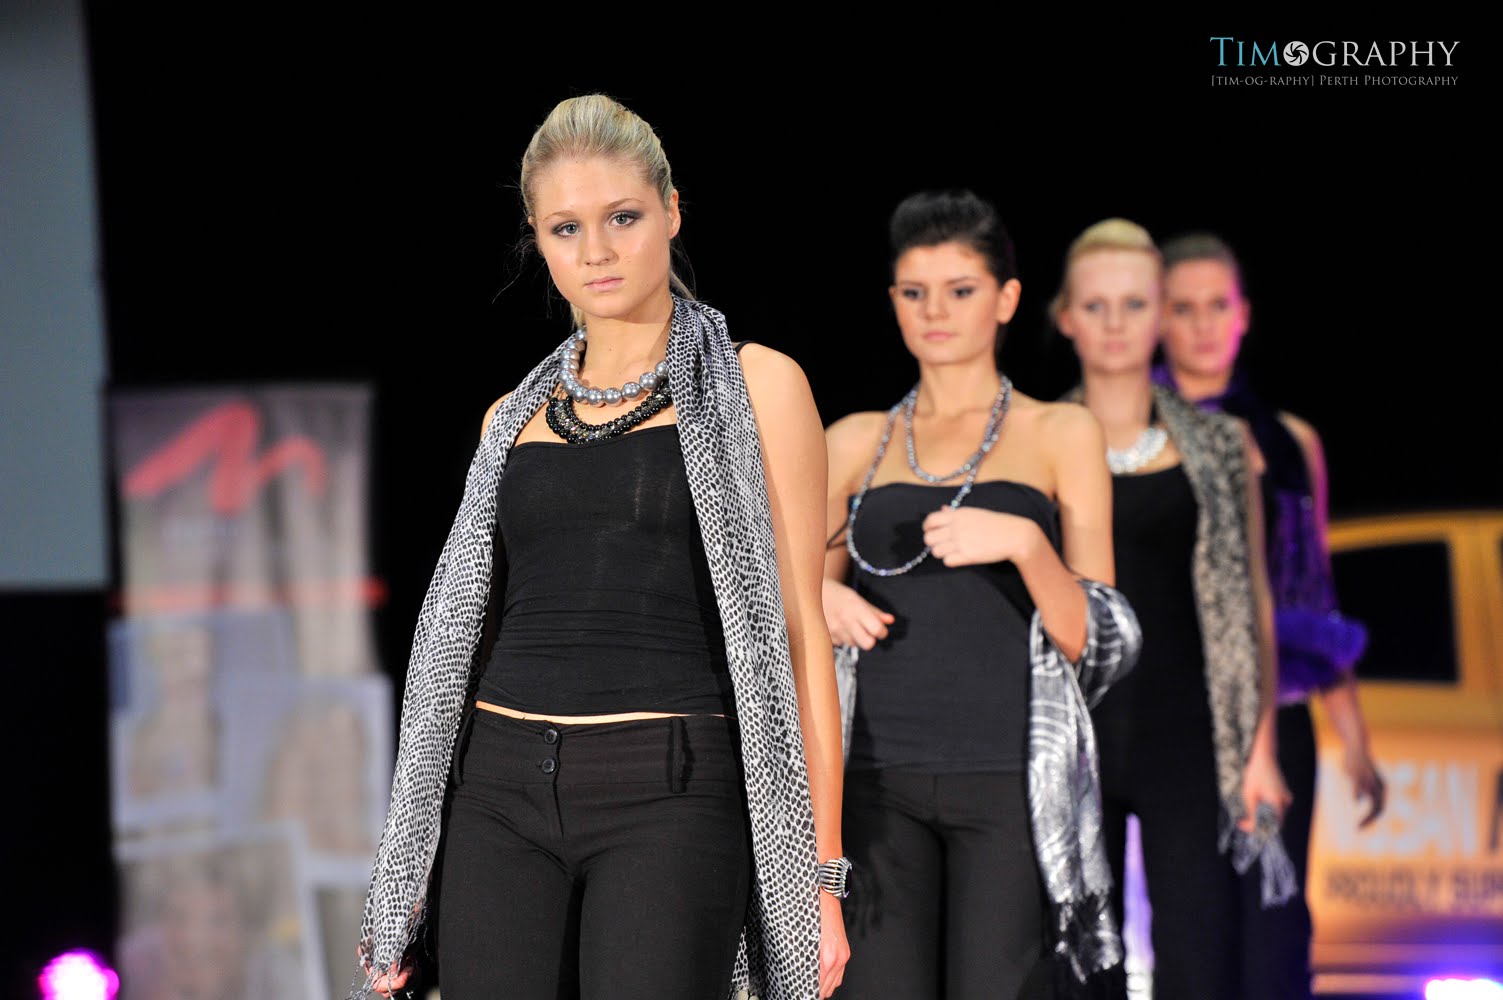
The final image I’ll talk about for today was taken at the 2011 ISDE Conference which was held at the Perth Convention and Exhibition Centre. By the way, ISDE stands for International Symposium for the Digital Earth. Sounds really nerdy but it is actually really interesting. I have been fortunate enough to have won the tender to photograph this event for the last few years and it is always a challenge and also really hard work. It also presents some pretty difficult photographic conditions. The bulk of the shooting I was required to do was going to take place in the big 6000 seat auditorium with only the bare minimum of stage lighting and only one (stationary) spotlight on the speakers as they were delivering their presentations. What does this mean? Well basically it means that I would be standing a long way away in near darkness without a tripod (they are deemed a health risk in the event of a building evacuation). Fun huh. So for this I enlisted my Nikon D3s, a camera known for being a fantastic performer in said dark lighting conditions, coupled to a Nikon AF-S 300mm f/2.8G ED VRII lens. This lens is enormous and really heavy, so hand-holding for long periods of time was really out of the question. Fortunately using a monopod was allowed and that ended up being my saviour. Taken with my Nikon D3s, 1/80th second, f/2.8, ISO3200, and obviously the Nikon AF-S 300mm f/2.8G ED VRII was at 300mm, because it’s a prime lens. :) FYI - this is a testament to how well the Vibration Reduction mechanism works in the new line of Nikon Pro lenses. Try getting a sharp image with a non-VR lens at 300mm with a shutter speed about three stops lower than you should be using to handhold the shot. I think thats pretty cool. Just sayin... 

Well, that’s as much spare time as I can wrangle at the moment, so take care, keep shooting what you love and I’ll talk to you all... soon!    

Sunday, July 31, 2011

Small lights in a big studio... and more underpants...

Hey there all and thanks for tuning in for another blog post. Today we have a little bit of a continuation from the last blog post, insomuch that the images accompanying this blog were taken during the same shoot with Serena.


So why share these images, you ask? Well the thing I liked about these is that I did this entire series of images using only speedlights, triggered by PocketWizard TT1 and TT5’s. From memory I have only ever done this once before, but as that was some time ago (a few years in fact) so I was keen to try this out again.

The diagram on the right shows the lighting set-up itself. Pretty simple really. I mounted the softboxes and beauty dish to my SB-900’s by using a bunch of these great little flash brackets that you can get on eBay. They are so much sturdier than some of the other rubbish out there and they really do take a beating and are capable of supporting quite a bit of weight.


I don’t quite remember the exact light ratios – sorry – but I can tell you that the key light (the beauty dish) was metering on Serena’s face at f/4 and I’m pretty sure that the softboxes were about 2/3rd’s of a stop below that; which makes them register the light meter at f/3.2. Shooting at this aperture allowed me to capture some of that gorgeous depth-of-field that you can see. Yummy. Well, I like it at least…


The image on the left above was actually a test shot, wherein I turned the beauty dish light off all-together “just to see what it looked like”. I have to say that I don’t mind it but all in all I thought there was just a little too much contrast for my liking, for what I had envisaged in my head to what was appearing on the back of my Nikon D3s. Not to worry, a flick of a switch on the PocketWizard AC3 zone controller sitting atop the camera and the beauty dish was turned back on again. That sure as heck beats getting up and down and having to fiddle around on the back of the flash itself to adjust stuff. Enough said.

Although speaking of not saying quite enough, I should point out that all the lights, even though they were TTL capable SB-900’s being triggered by TTL capable PocketWizard radio’s; everything was set to manual. Again, although I didn’t write it down; but from memory I think the beauty dish was at about 1/8th power, making the softboxes dialled into 1/8th minus 2/3 of a stop. This translated into almost instantaneous power recycling and allows 8 shots in one quick burst without having to stop and let the flashes recharge. Cool.

Getting back to the lighting diagram just for a moment, you may also notice that all the lights were gridded. I really love the control this gives for reducing the amount of light that spills all over the place. The beauty dish also had a “sock” on it in addition to the grid to soften the light just a little bit more. So the white backdrop roll that I was using turned that nice pleasant neutral grey.

Well that’s about all I can think to write for now. It’s been a really long week and a flat-out weekend so I’m going to call it a night. Thanks for reading, keep shooting what you love and I’ll talk to you soon.

Thursday, July 14, 2011

One light shenanigans... and lens flare...

Well hey there everyone and welcome to yet another blog post. I must find out how long this blog has been running now, but I think it’s somewhere in the neighbourhood of 2 years. Who said I didn’t have any staying power? Shame on you!

The purpose of today’s blog post is to share some images that I did recently for a long-time friend, Serena. She has been a great help over the past four or so years, and is always eager to help out when I need a model at short notice for a shoot. I had just finished watching the wonderful “One Light Workshop” DVD’s by the uber talented Zack Arias. As the name of the DVD’s implies, there’s about 3 ½ hours of lighting instruction using only one light source – but in multiple applications. Studio lighting. Location lighting. Day or night. Zack is da man!

Anyway, one of the examples he showed in the latter part of the first DVD was the technique that produced the images I shot for this blog post. It involves creating a high-key look using only one light source. Those of you who know me know that I love to use high-key lighting. I love the way it makes the subject leap out of the image. I love the crispness and the contrast it creates. I just love everything about it. But, like anything it can get a little bit too much after a while. So I was pretty stoked when I saw Zack demonstrate this technique. The end result is that it still, obviously, creates a high-key image, but because of the positioning of the light you can create some really cool lens flare and also it makes the subjects skin go all creamy and delicious.

It basically involves placing a single studio light directly behind your subject. The catch is however is that the flash tube must be exposed, and not hidden by any kind of light modifier. This also means that you really can’t use a speedlight to create this effect, as it isn’t going to throw enough light in enough directions all at once to pull it off successfully. If you haven’t already, have a look at the video below which shows the whole set-up from go-to-woah. Sorry that the audio isn't all that great - my eBay special video camera doesn't have any audio-in jack meaning that I just have to use the built-in microphone and speak in a loud voice. This works well when I'm right next to the camera, but as soon as a walk away from it things go a little pear shaped. Anyway, enough excuses from me, take a look at the video...


One more thing – and one that I touched on in the video. You really have to be careful with your lens selection with this. Let me qualify what I mean. You really have to use the best lens that you have. This is because better quality lenses utilize all manner of glass witchcraftery to aid in the reduction of lens flare. And this is one lighting set-up that produces a lot of flare. A lot of cheaper lenses really don’t deal well with back-lighting. The biggest degradation occurs when the entire image looks washed out and pale. The tell-tale “rainbow spots” are another sure-fire sign of lens flare, but these can sometimes look quite cool.

But there ain’t nothing nice about a pale, washed out image. You can recover a lot of contrast in post production, but if the image is too far gone to begin with, there isn’t going to be a lot to gain by trying to fix it. A bad image is a bad image. I was using my Nikon AF-S 70-200mm f/2.8G ED VRII and I was still struggling with a few images having too much flare. Point made...

So there you go. Nice and simple set-up that creates really cool images. This one is going to be on my play light for a little while to come. That’s it for now. Keep shooting what you love and I’ll talk to you soon.


Sunday, June 26, 2011

A rushed visit... and almost no noise...


Hey there everyone and welcome to another brief blog posting by yours truly. This week saw the Brownes Every Woman Expo back at the Perth Convention and Exhibition Centre.


I had hoped to get along to a few different parades that were on show during the Expo but alas my schedule had other ideas. So as it ended up I was only able to attend on Friday evening for an hour or so before having to head off again.


It was great to see the girls and guys from Metro Modelling Academy back again, and I was able to re-connect with a few old friends and models that I hadn’t seen for ages; so that was cool. It was also great to see that this year the organisers had finally got their acts together and they set up lighting for the shows that actually made the models look good.


In previous years the lighting had been everything from inadequate to down-right unflattering. One year I even resided to bringing my own studio lighting with me just so I wouldn’t be stuck with the awful ambient light “show”. This year however, they had set up flood lights pointing right down the barrel of the runway. And they had also thankfully gotten rid of those awful and large LED multi-colored floods along the length of the runway. But anyway, enough of that for now.


Now I realize that these images are by no means ground breaking. They’re pretty average actually. Let me qualify that. They are an accurate representation of the evening by the way the models have been captured. And I am proud to admit that I have not altered these images at all from how they came out of my Nikon D3s. Another qualification is required here for obvious reasons. Yeah I have resized them for this blog and applied my watermark – but that’s it – hand on heart.


Thankfully, because the organisers had got the lighting spot on, I was able to shoot the whole show in manual mode, 1/250th second shutter speed, f/4.0 @ ISO1600. Oh, I had my Nikon AF-S 70-200mm G ED VRII lens, with the VR turn on, of course. In previous years I had to switch between manual and aperture priority depending on the particular show I was shooting and how the stage lighting was behaving. It really was like trying to shoot a rock concert with all the flashing lights and the stage going light – dim – light – dim; well you get the idea. But yeah, take a look at the images; they're pretty squeaky clean considering they were shot at ISO 1600.


Anyway, it was a great (albeit short) night and I’m sorry that I didn’t get to see more shows. But hopefully my schedule won’t be quite as busy next year huh. Take care everyone, keep shooting what you love and I’ll talk to you all soon.